Have you noticed water pooling behind your dryer, musty smells, or clothes taking longer to dry? These signs often point to a leaking dryer vent, an issue many homeowners overlook until it leads to costly damage. A leaking dryer vent doesn’t just make your laundry routine frustrating; it can cause mold, raise energy bills, and even become a fire risk if left unattended.
In this blog, we’ll discuss why dryer vents leak, how to fix them, and how dryer vent repair can help keep your home safe and efficient.
Why Do Dryer Vents Leak?
Dryer vents leak when hot, moist air from the dryer doesn’t exit the house properly. Instead of moving smoothly through the vent, the air slows down, cools off, and forms condensation inside the duct. This moisture collects and eventually leaks through weak spots, joints, or damaged sections, causing stains, mold, and other problems.
In this section, we’ll discuss what causes dryer vent leaks and how to spot them early.
Lint Buildup
Every time you dry clothes, tiny fibers from your laundry break off and form lint. While the lint trap inside your dryer catches a lot of it, some always escapes into the vent pipe. As the air blows through the vent, this leftover lint sticks to the inside walls. Over time, it builds up layer by layer, narrowing the airflow passage inside the vent.
When airflow is restricted, the moist, hot air from the dryer gets trapped. This causes condensation inside the pipe, which may leak out through seams or joints. You might notice puddles on the floor, damp smells, or slower drying times. If left uncleaned, lint buildup can also become a serious fire hazard.
Poor Installation
A dryer vent that isn’t installed properly can easily start to leak. This usually happens when the vent uses flexible plastic or foil tubing, which is not recommended. These materials are more likely to kink, sag, or tear over time. Also, if the vent isn’t firmly connected to both the dryer and the wall exit, it can become loose or fall apart.
When installation is sloppy, gaps or holes form where hot, moist air escapes. These leaks allow condensation to form inside your home or walls, leading to water damage or even mold. Ensuring your dryer vent is made from solid metal and installed in a straight, secure line is key to preventing leaks.
Cracked Or Crushed Vent
Over time, the vent pipe itself can become damaged. Cracks can form due to wear and tear, especially if the pipe is made from older, lower-quality materials. If the dryer is pushed too far against the wall, the vent can also become bent or crushed. This restricts airflow and weakens the duct walls, increasing the chances of leaks.
Even small cracks can be a big problem. They allow warm air and moisture to leak out before reaching the vent exit. This can result in wet patches near the dryer or moisture inside walls and floors. Cracked or crushed vent sections should be replaced right away to stop leaks and keep the dryer running safely.
Loose Connections
Most dryer vent systems are made up of several sections of pipe connected together. If these joints aren’t sealed properly, they can loosen over time—especially due to vibration from the dryer or shifting during cleaning. Some people use duct tape or incorrect materials that wear off or dry out quickly.
Loose connections mean hot air doesn’t stay contained within the vent system. Instead, it seeps out where the pipes meet, causing moisture to build up inside the laundry area or behind walls. This can also lower the efficiency of your dryer and raise your energy bills. Using proper clamps and foil tape can help keep everything tightly sealed.
Vent Is Too Long
A dryer vent that’s too long or has too many twists and turns can cause major airflow problems. Each extra foot of length or added bend makes it harder for the air to travel all the way out. If the air slows down too much, moisture doesn’t leave the vent as fast as it should.
This trapped moisture eventually condenses inside the pipe and may begin to leak out. You’ll often find leaks at the lowest point of the vent or near joints where water collects. A shorter, more direct vent route keeps airflow strong and prevents these kinds of problems.
Read More: Can Air Duct Cleaning Reduce Your Home’s Carbon Footprint?
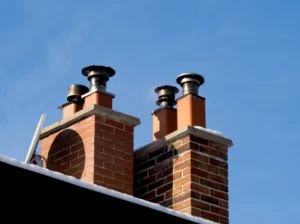
Outside Vent Blocked
At the end of your dryer vent line is an outside vent hood or flap. This part is supposed to open when hot air blows out and close when the dryer is off. But sometimes, it gets blocked by lint, dirt, leaves, or even bird nests. When this happens, air can’t escape freely.
The blockage causes pressure to build up inside the pipe. As the trapped air cools, it turns into condensation and begins to leak. You might also notice that your dryer takes longer to dry clothes or feels hotter than usual. Regularly checking and cleaning the outside vent can prevent leaks and improve performance.
Cold Vent Areas
If part of your dryer vent runs through cold areas like a garage, basement, or attic, the hot air inside cools quickly. When warm, moist air meets cold metal, it turns into water droplets—a process called condensation. This is a very common cause of water leaking from vents.
Condensation can collect inside the pipe and eventually leak out through small gaps or seams. It may even cause puddles on the floor or drip down walls. Insulating the vent pipe in these cold areas helps reduce this issue by keeping the air warm and preventing moisture from forming.
How to Fix a Leaking Dryer Vent
Fixing a leaking dryer vent might sound intimidating, but it’s very doable—even if you’ve never done it before. The key is to identify where the leak is happening, what’s causing it, and then use the right tools and materials to seal or replace the faulty part. Most repairs involve cleaning, sealing connections, or replacing damaged sections of the vent pipe.
In the steps below, we’ll walk you through exactly how to fix a leaking dryer vent safely and effectively.
Unplug The Dryer
Start by turning off and unplugging your dryer. If you’re using a gas dryer, you should also shut off the gas supply to avoid any risk of gas leaks. Carefully pull the dryer away from the wall to give yourself enough space to access the vent behind it. Keep a flashlight nearby so you can see clearly behind and around the machine.
This step is all about safety. Electrical dryers carry a shock risk if left plugged in, and gas dryers pose a fire or gas inhalation hazard if disturbed while still connected. Starting your repair with everything powered down ensures that you can work without danger, even if you need to cut or remove parts of the vent.
Locate The Leak
Once everything is safely turned off, visually inspect the vent hose, duct joints, and pipe connections. Look for loose fittings, crushed or torn hoses, visible rust, dripping water, or lint buildup. Pay close attention to the back of the dryer and the area where the pipe passes through the wall or ceiling.
You might not always see the leak right away. Sometimes, running the dryer for a minute or two can help you spot where steam or warm air is escaping. Feeling around the vent with your hand can also help identify leaks. Pinpointing the exact leak source is crucial for an effective fix—otherwise, you’re just guessing.
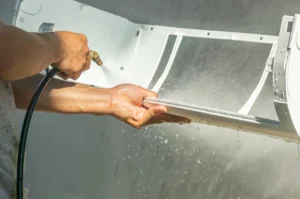
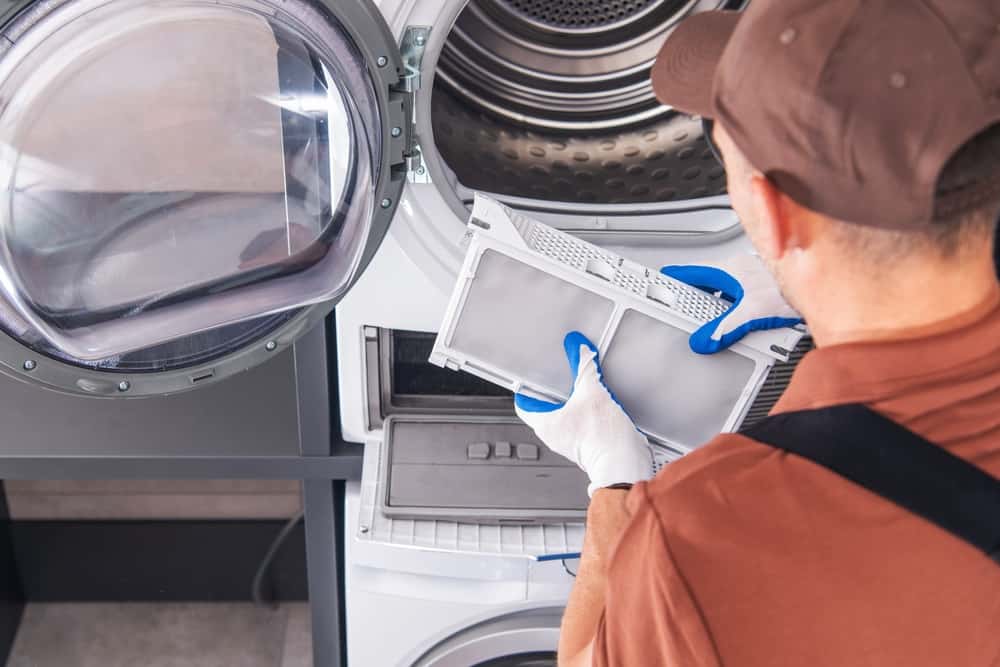
Clean Out Lint
Use a vacuum cleaner, dryer vent cleaning brush, or a vent snake to clear out lint from the entire length of the duct. Detach the vent from both the dryer and the wall outlet if needed, and clean from both ends. Make sure you remove any lint buildup near the vent hood outside your house too.
Lint buildup is one of the most common causes of vent leaks and dryer inefficiency. It blocks airflow, traps heat, and encourages condensation inside the duct. Over time, this can lead to leaks, water damage, and even dryer fires. Cleaning it thoroughly gives you a fresh start and ensures better airflow.
Seal Loose Joints
If you find that vent connections are loose or separating, seal them tightly using aluminum foil tape—the kind made specifically for HVAC systems. Wrap the tape snugly around all loose joints, overlapping each wrap to make it airtight. If the sections keep slipping, you can secure them with metal clamps or zip ties before taping.
Loose connections are one of the leading causes of dryer vent leaks. Even a small gap can let out hot, moist air, which can condense on nearby surfaces and cause water damage over time. Tightly sealed joints ensure that all the airflow moves through the vent as intended—straight from the dryer to the outside.
Replace Damaged Sections
If any part of the duct is torn, cracked, severely rusted, or squished flat, replace the dryer vent. Measure the length of the damaged section and cut a matching piece of rigid metal duct (preferably aluminum or galvanized steel). Fit the new section in place, connect it securely using foil tape and clamps, and ensure it’s airtight.
Damaged sections are too risky to leave in place. Cracks or holes allow moisture and lint to escape, which can ruin walls, ceilings, and floors. Flexible plastic or foil ducts may seem like easy fixes, but they tend to trap lint and degrade quickly. Rigid metal ducts last longer, are easier to clean, and reduce fire risk.
Insulate Cold Sections
If your dryer vent passes through unheated areas like a crawlspace, attic, or garage, insulate it to prevent condensation. Use foam or fiberglass pipe insulation that’s cut to fit the duct diameter. Wrap the insulation around the pipe, then secure it with zip ties or aluminum tape.
When warm air from the dryer travels through a cold vent, condensation forms on the inside walls. This moisture can drip out through seams or tiny cracks, leading to leaks. Insulating the vent helps maintain a stable temperature inside the duct, reducing the chance of moisture buildup and keeping your system efficient.
Clean The Outside Vent
Go outside and locate the vent hood where the duct exits your home. Check if the flap opens and closes properly. Use your hand or a small brush to remove lint, leaves, and other debris. If the vent cover is cracked or stuck, it’s best to replace it with a new one.
A clogged or broken outside vent prevents air from flowing out properly, which can cause a backup of hot, moist air inside the vent. This buildup often leads to leaks, mold, and overheating. A clean and functioning vent hood ensures that the air escapes freely and your entire system works the way it should.
Read More: How Often Should You Clean Your Air Ducts?
Prevent Dryer Vent Leaks
Preventing dryer vent leaks is crucial for the safe and efficient operation of your dryer. Leaks can lead to wasted energy, increased drying times, and, in some cases, even fire hazards. To keep your system in top shape, regular maintenance and proper dryer vent installation are key.
Below, we will discuss practical ways to prevent dryer vent leaks, with simple tips for maintaining your vent system.
Regular Cleaning
Regular cleaning of your dryer vent is crucial to prevent leaks. Lint buildup obstructs airflow and puts pressure on the system, which can cause air to escape through cracks. Cleaning your vent every few months ensures smooth airflow and reduces the risk of leaks or fires.
A clean vent improves dryer efficiency by allowing warm air to flow freely, speeding up drying times and lowering energy consumption. Regular cleaning helps extend the life of your dryer and ensures it operates safely.
Stronger Ducting
Using durable, rigid metal ducts instead of plastic or foil can prevent dryer vent leaks. Plastic and foil are more prone to damage and cracks, while metal ducts offer better durability and smoother airflow, reducing the chances of leaks.
Metal ducts also handle heat better and are less likely to wear out from constant hot air and moisture exposure. They provide a safer, longer-lasting solution for your dryer vent system.
Read More: Why Air Duct Cleaning Should Be Part of Spring Cleaning
Shorten the Vent
Keeping your vent system as short and direct as possible can minimize the risk of leaks. A longer vent creates more air resistance, leading to pressure and potential cracks. Fewer bends also make the system more efficient and reduce wear on the dryer.
A shorter, more direct vent allows for smoother airflow, improving dryer efficiency and lowering energy consumption.
Inspect Often
Regularly inspecting your dryer vent helps catch issues like loose connections, cracks, or damaged vent caps before they become problems. These issues can lead to leaks and reduced airflow, affecting dryer performance and safety.
Look for any signs of wear, such as clothes taking longer to dry or improper vent cap closure. Early detection of issues helps avoid costly repairs and ensures safe dryer operation.
Need Help with Dryer Vent Repair?
If your dryer vent is leaking or clogged, trying to fix it yourself could make matters worse. At Accurate Duct Cleaning, we offer professional dryer vent repair services to ensure your system runs smoothly and safely. Whether it’s a minor leak or a complete replacement, our experienced team has you covered. Fix your leaky dryer vent—contact us today for expert repair services!